One of my 2022 goals was to learn how to make my own glaze, and boy was it intimidating. There are so many things to learn and it seems daunting to start. I finally took the plunge in October, after 10 months of taking the Ceramic Material Workshop class, and I'll just use one of the glazes I made as an example of STEP BY STEP how I made this glaze, in hoping it would help someone start dabble into the sea of glaze making.
Caveat before starting:
*this is a VERY simplified version for lazy people like me who don't want to get through a whole 600 pages of textbook or 8 weeks of online lecture just to learn how to read glazy.org or try making one glaze*
*I fire to cone 6*
If you want a thorough understanding of chemistry of glaze, and be able to make changes to the formula, troubleshooting, create new colors, fancy stuff, by all means, you should take the Ceramics Materials Workshop classes. I recommend the Middle Glaze class. The teacher Matt is very thorough teaching from the very basics of glaze. And it is absolutely the best kind of information overload for someone who has no knowledge or background of glazing. I rewatched this lecture a couple of times and I am still not retaining all the knowledge from these classes.
Here's what I would tell my younger self where to start making glaze.
If you are like me who just wanted to make my own glaze to save money, and most likely will choose the popular tested glaze formulas from glazy.org, then I would start with OldForgeCreations' article here on the 5 ingredients of glaze and follow the below steps (as an example) to start making glazes.
Step by step making a glaze test:
1. Pick a formula/glaze
I am going to use one of OldForgeCreations formula/glaze as an example as his glaze has been tested by him and many others who follow him (see glazy.org). So starting with this article here:
https://www.oldforgecreations.co.uk/blog/my-new-favourite-glaze
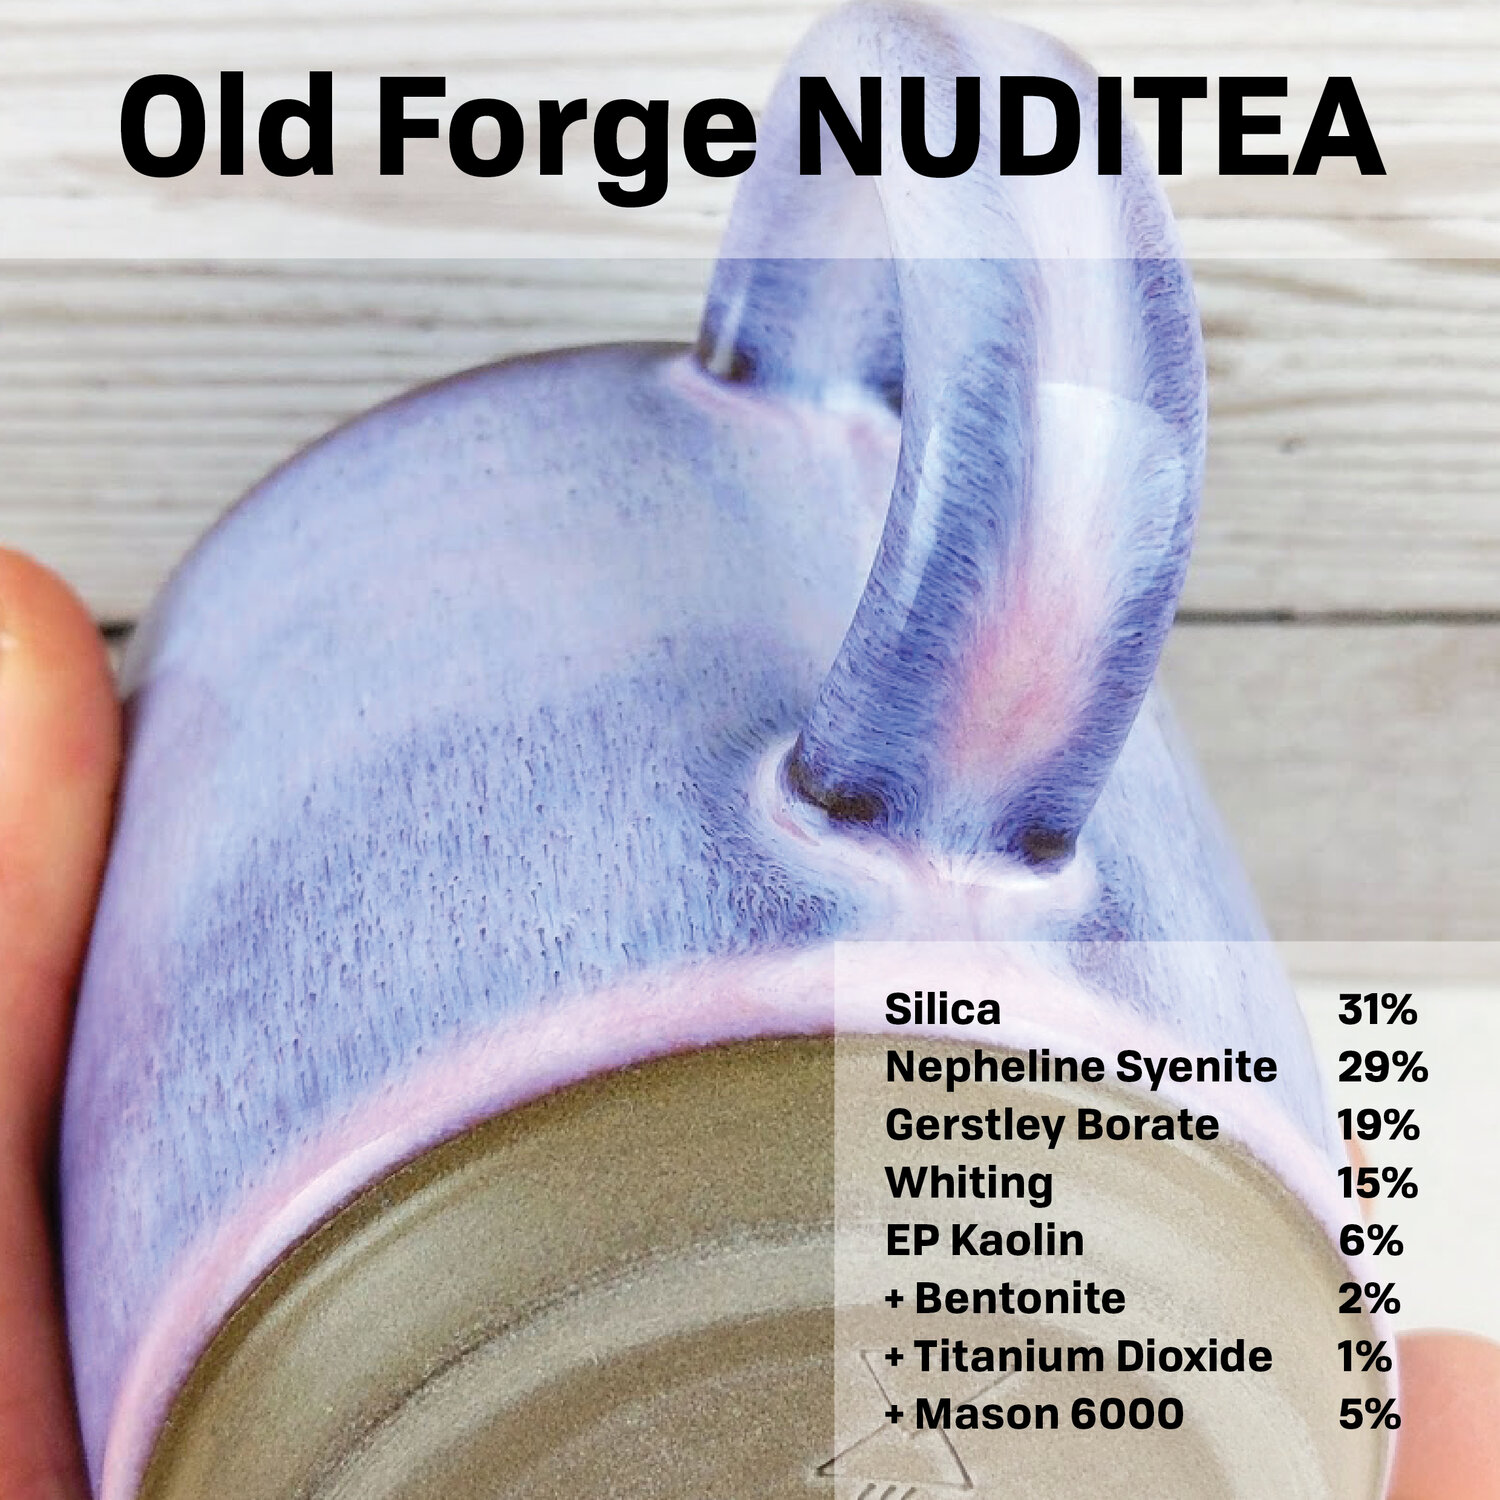
I picked the pink/purple glaze to try and below is what it looks like and the formula in the corner:
2. Gather ingredients
I got all my glaze chemicals from theceramicshop.com. See below links if you are having trouble searching:
- silica (I bought 5 lb, each unit on theceramicshop.com is 1 lb)
- Nepheline Syenite (5 lb)
- Gerstley Borate (3 lb)
- Whiting (3 lb)
- EP Kaolin (also called 'EPK', 3 lb)
- Bentonite (1 lb)
- Titamium Dioxide (1 lb)
- Mason 6000 (1/4 lb)
Note that the amount you buy is totally up to you. I am going to continue making glazes, and these are all common ingredients to many glazes so I will have leftovers.
You can also check your local ceramic shops that may carry glaze ingredients. For people living in Northwest Arkansas, The Clay Bank (4000 Johnson Rd, Springdale, AR 72762) is where I would go.
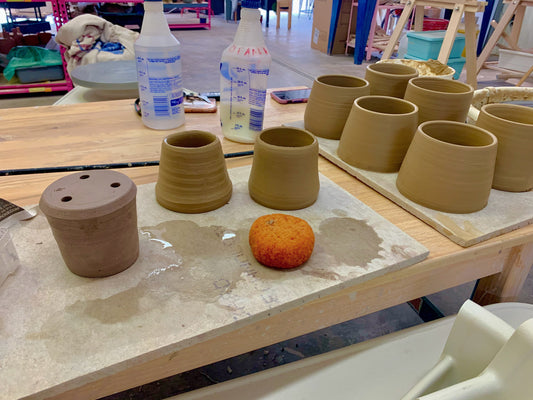
3. Create a test tile
Most people create a cylinder on the wheel and cut it to size for test tiles. You can also create these with handbuild slabs and cut into small tiles. This hopefully is the easy part! See a youtube link from Earth Nation Ceramics on detailed demo of creating test tile.
Obviously, this test tile needs to be fired (at cone 04) then ready to be dipped in the test glaze.
4. Create a sample glaze powder

In OldForgeCreations article on starting to create glaze, he recommended starting with 100g of glaze as testing size. Here's wtf that means:
This is the formula above we chose:
- Silica 31%
- Nepheline Syenite 29%
- Gerstley Borate 19%
- Whiting 15%
- EP Kaolin 6%
- + Bentonite 2% (to keep chemicals afloat & not sink to bottom)
- + Titanium Dioxide 1% (colorant)
Everything that doesn't have a "+" in front of it makes up the 100% of the 100g. So, to make this glaze, you need 31g of Silica, 29g of Nepheline Syenite, 19g of Gerstley Borate, 15g of whiting, 6g of EP Kaolin. Then you add 2g of Bentonite, 1g of Titanium Dioxide. Total gram would be 103g.
I found these Walmart 5.5 oz containers to be perfect for 100g of glaze testings.
5. Add water
There's a whole chapter that can be written on how much water to add and what the specific gravity is. But ultimately, for simplicity sake, we need this formula to be about 1.4 specific gravity (I ended up brushing it on), which means for the 100 ml of this glaze, it should weigh 140g.
At our local studio, we usually convert the grams of the dry glaze powder into grams of water (or lb). So for 103g of dry material, I would aim to add 103g of water.
So to do so, I would add about 85-90g of water to the glaze powder you created, sieve through a 80 mesh sieve like here and here. When you sieve, you are bound to have to add a bit more water to flush the ingredients off (approximately 15g-20g of water) which will give you 103g - 105g of water total.
Then with this sieved glaze, you can either dip your finger and see how much it sticks and eyeball it, or you can pour into a measuring cylinder or a syringe on a weight scale to weigh the glaze. Hopefully the 100ml of glaze weigh about 140g (or 10ml weighing 14g). Here's a video by Jon the Potter detailed out how to calculate specific gravity.
Note, you can always add more water if the glaze is too thick, but it's much harder to extract water if you added too much. So add water slowly.
If you added too much water, I would continue the glaze making process until finish, and let it sit for a day or two. The clear water will usually rise to the top and you can pour it out.
6. Dip your test tile into the glaze
The most satisfying part is to see the glaze dry on the bisque ware.
7. Mark the glaze tile
I write a number on the bottom of my glaze tile and I have a notebook that I write corresponding formula and notes on the glaze.
8. Fire your glaze test!
If you picked a less tested formula, or creating your own formula, it might be better to have a little tray under the test tile to protect the kiln shelf in case the glaze ran.
I would start with Joe Thompson's (OldForgeCreations) FirstFive glaze recipes (something fairly stable and easy) and move on from there.
That's it for creating a test tile for glazing! Feel free to drop your favorite glaze formula below in the comments!