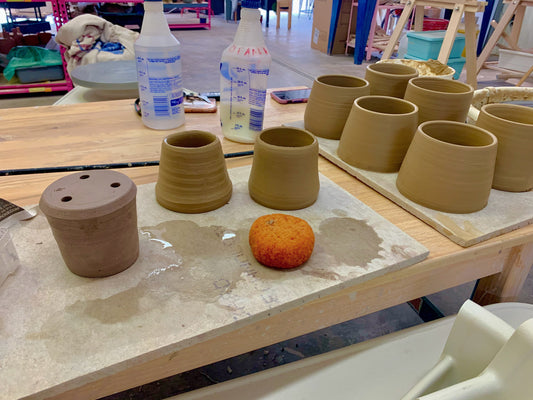
My first version of the studio involves having a picnic table with a 2 ft x 4 ft plywood board as my wedging table and hand building space. It took me well over 6 months to get my home studio set up the way I envisioned it, and it's still evolving as I learn more on my journey. Here's what I learned so far from building my own studio.
1. Figure out what you want from the home studio
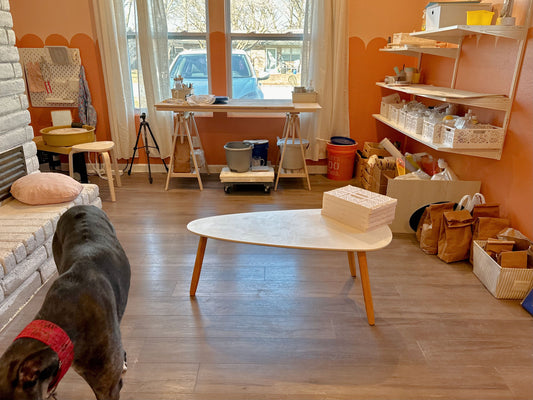
I wanted to have a place in my house designated for both pottery (a wheel, a table for wedging & hand building) and work. I would love for it to be right next to a window with ample natural light. I also needed some shelving space.
I don't need a kiln as I go to my local studio (Fifth Street Studio) to fire my pieces.
Some of the questions you should ask yourself:
- Are you throwing on a wheel or only hand building?
- Do you need space for your wheels and/or kiln?
- Is there proper electricity & ventilation?
- What is the flooring situation? Carpet would be a bad idea. Perhaps putting down a tarp if you must have carpet, or choose another area around the house that's easier to clean.
No matter how small your home is, you can find space for your studio. Check out this awesome video from Pottery to the People that inspired me in my journey. This girl literally have a studio apartment in Europe (so even smaller than US studio apartments!) and she was able to do some of the pottery at home. So you can too!
2. Find inspiration
Here's mine: Pottery Studio Pinterest board
I found the main theme of the studios that were drawn to me: natural colored shelving, clean and organized tool racks, designated space for the pottery process (throwing, drying, glazing, recycling, etc.). So I designed my studio based on these principles.
3. Plan the layout

I used a dotted grid notebook to draw them proportionally to get a feel for the correct size of the furniture (shelves, wheel, computer desk, table, etc.) in the room.

4. Take your time and mull it over
I wasn't sure whether I'd go with the shelves mounted on the wall (IKEA BOAXEL) or standing shelves (IKEA IVAR this one below).

I eventually decided to go with ikea's Boaxel line which you can design it however you'd like. I could totally see the IVAR shelves working in another's space but I chose Boaxel because I wanted the shelves to be on the walls so it feels less claustrophobic.
My original set up on IKEA's website looked like this:

My wall is about 8 ft tall & 10 ft wide, so I chose 4 of the 79 inch upright brackets to hold up the shelves (each bracket is about 32 inches from the other, which is usually two studs wide). You can find the studs in your walls with a stud finder like this before deciding on the model too. Usually each stud is 16 inches from the next.
Also, yes the little hangers are on purpose because I wanted a space to hang my cleaning towels to dry.
Here's what it looks like now.

Let me know what your ceramic studio layout is like in the comments.